Displaying Your Artistic Portraits
Simple portrait hanging ideas for displaying framed pictures and canvas art prints.
TOG TIPS
Elizabeth White
Portrait Hanging Tips & Inspiration
You’re a rock star! You organized the family, planned wardrobes, styled hair and made it through your Portrait Session! Now you are at the point of deciding how to display your new portrait art. The first step is choosing your favorite portraits and what type of mounting options suit your style. I am happy to suggest combinations of images and what sizes I think complement one another to tell your story.
Read on for some gorgeous wall gallery inspiration and a few tips so you can hang portraits perfectly the first time, without it being a daunting task.
Hang the portraits at an appropriate height. Portraits should be hung where the eye naturally goes. It is best to hang your pictures so the center of the frame is about 57″ above the floor. If portraits are hung over a couch, place the bottom of the frame 6″-8″ above where someone’s head would be (you don’t want someone banging their head on the frame!)
When hanging a gallery wall, you can cut paper into the sizes of each of your frames and arrange the paper on the wall before making holes. Hang portraits 3-6 inches apart, and have the center of the display roughly 57 inches from the floor.
Most larger frames or Canvas Art will have a wire hanger across the back. Pull the wire taught toward the top of the frame. Measure the distance between the top of the frame and the wire. That is where you want the hook on your picture hanger to be. Place the hanger so the hook lies at this spot, and hammer into the wall.
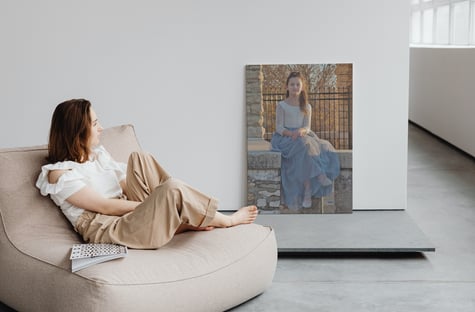
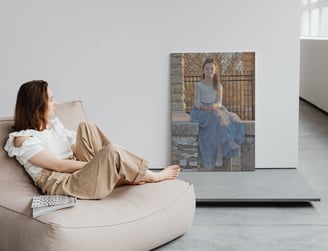
One exceptionally large Portrait will make a bold statement in any room! To create a relaxed, casual display, lean a large framed portrait or canvas against a wall. Position it directly on the floor next to a sofa or bed.
A grid or checkerboard pattern wall layout is a simple way to showcase a lot of canvas pieces or framed prints. The key to a symmetrical wall display is to feature artwork that is all the same size. Landscape, square and vertical print orientations can all be easily hung in a grid pattern. You can use grid layout to hang a mixed collection of old and new portraits , black and white and color print combos, groups of photos from a special event like a wedding, religious celebration, family party etc.
Wall art displayed in a horizontal row is aesthetically pleasing. We naturally scan a room or wall from left to right just like we read a book. A row of pictures is easy to view and the simple layout will work above most furniture in your home. Canvas Art displayed in vertical columns can be just as impactful. Do you have a skinny wall to fill? How would a column of pictures look in that space? Try it!
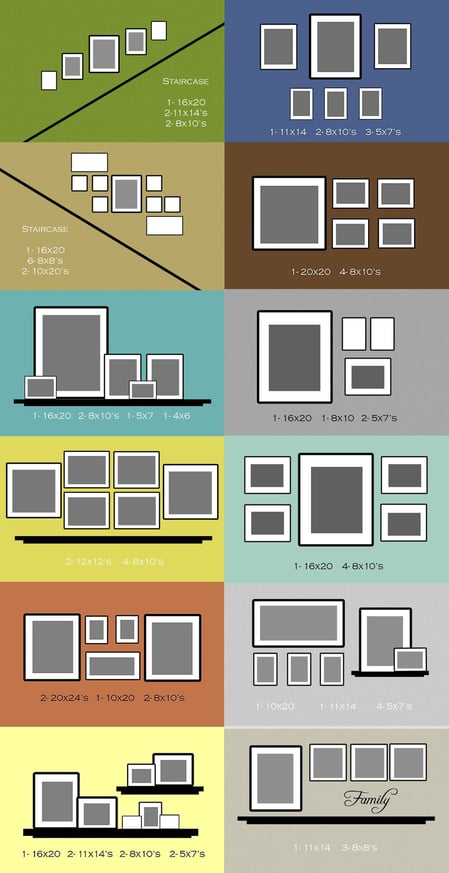
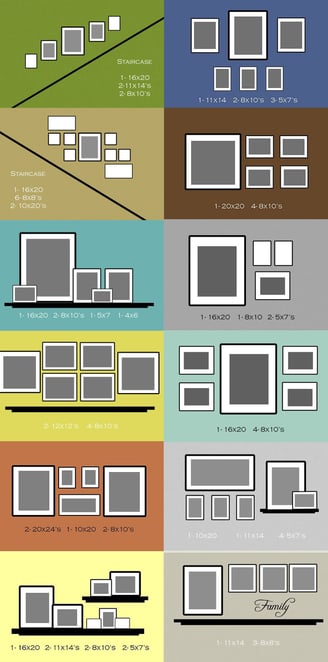
There are endless ways to create a classic asymmetrical photo gallery wall display! The examples features prints in different sizes and layouts.
Have fun with your arrangements. Have all your frames a uniform distance from each other. Line up your frames so that some align across the bottom of the frame, some across the top. Others can be lined up vertically, either right or left. For some layouts, you may want to line up the top or bottom of one frame with the center of another. Mix family portraits with other art pieces that match the mood, feel, or colors in your portraits, and add pieces that are meaningful to your family.
When Planning, Measure the space of wall you want to fill. Then Decide whether you would like all your frames the same size or go for a variety of sizes and their style. Choose the photos you want to print and which size suits each print, which ones you want big, which ones are best in a smaller frame, and whether you want all portraits or a mix of portraits with other art or photographs.
Kansas city | Lee's Summit | Peculiar | Raymore | Belton | Harrisonville
All content Copyright © 2023 Elizabeth White